How To Clone an Image
You can copy pixels from one image area to another in order to cover damaged or unwanted elements in an image. For example, you can fix a tear or remove a person from an image by applying cloned pixels over the area you want to remove. You can also clone image elements you like and apply them to another image area or a second image. If you clone an object, the newly cloned areas are added to the active object. You can also create abstract images, based on pixels sampled from the original image.
For this guide we’ll be using CorelPHOTO-PAINT, included in CorelDRAW Graphics Suite.
1. Open the Image
There are a couple of ways to open the image. From the Welcome Screen, select Get Started and then click on the button to Open Document, alternatively, from File > Open.

2. Cloning an object
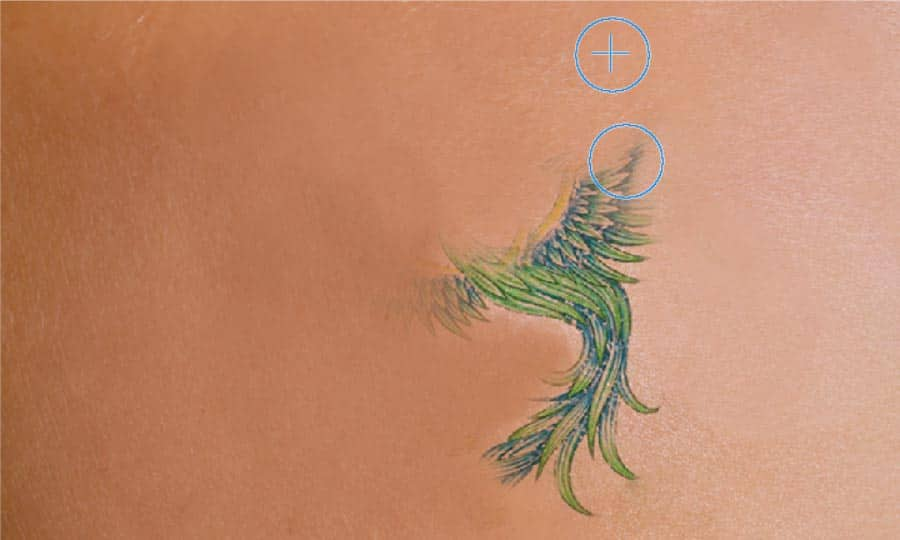
In this image, we are going to want to remove the dragon tattoo from this girls back. It is quite easy to do with the clone tool.
When you clone, two brushes appear in the image window: a source point brush and a clone brush that applies the copied pixels from the source point. A crosshair pointer is displayed in the source point brush to distinguish it from the clone brush. The source point brush moves relative to the clone brush as you drag across the image.
The brush size can be changes by holding down the shift key while dragging the mouse. Holding the Alt key will allow you to adjust the transparency.

3. Next Steps
Now that you have applied the effect, you can save the file out or continuing to edit your image in other ways.

CorelDRAW Graphics Suite does more than just allow you to clone objects
Check out some of the other graphic design features in CorelDRAW Graphics Suite, like How To Create A Transparent Image Gradient, How To Bulk Edit Images, How To Batch Resize Images, and more! Create high quality designs in a fun and easy to use graphic design software and make your work stand out more than ever.


